【版本】
当前版本号v20220915
| 版本 | 修改说明 |
|---|---|
| v20220915 | 初始化版本 |
【任务名称】 任务4.1 使用 Handler 实现多线程模拟登录
【任务目的】
- 掌握 Android 的 Handler 的使用
- 掌握 Android 的多线程编程
【任务环境】
- 一台运行 64 位版本的 Windows(8、10 或 11)、Linux、macOS(10.14 Mojave 或更高版本)或 Chrome 操作系统的计算机。
- 计算机可以访问互联网。
- 内存:至少6G
- 硬盘:至少空余20G
- JDK 8或以上
- Android Studio
【任务要求】
- 本实验承接实验3.3项目 SmartHome
- 在 smarthome 项目,使用Handler实现一个多线程模拟登录的界面,输入任意用户名,点击登录按钮,可以跳转到主界面,并提示“欢迎你+用户名”。
【任务步骤】
打开 smarthome 项目。
创建一个
MainActivity,作为登录跳转的主界面,存放的包路径为iot.app.smarthome.ui,此步骤略。创建一个
LoginHandlerActivity,依旧绑定实验3.3创建的布局activity_login.xml。请补充以下缺失的2个//TODO:部分的代码
public class LoginHandlerActivity extends AppCompatActivity {

    private LoginViewModel loginViewModel;
    private ActivityLoginBinding activityLoginBinding;
    private ProgressBar progressBar;
    private TextView username;
    private TextView password;
    private LoginHandler handler;
    private Button loginBtn;

    private static final class LoginHandler extends Handler {
        private WeakReference<LoginHandlerActivity> activity;

        public LoginHandler (LoginHandlerActivity act) {
            activity = new WeakReference<LoginHandlerActivity>(act);
        }

        @Override
        public void handleMessage(Message msg) {
            //TODO:请完成此处代码,获取用户名,跳转到MainActivity,并提示“欢迎你+用户名”。
        }
    }

    @Override
    protected void onCreate(Bundle savedInstanceState) {
        super.onCreate(savedInstanceState);
        //从视图中获取绑定对象
        activityLoginBinding = DataBindingUtil.setContentView(this, R.layout.activity_login);
        //设置绑定对象的生命周期拥有者为本对象
        activityLoginBinding.setLifecycleOwner(this);
        //创建 ViewModel
        loginViewModel = new ViewModelProvider(this).get(LoginViewModel.class);
        //绑定对象设值 ViewModel
        activityLoginBinding.setLoginViewModel(loginViewModel);
        loginBtn=(Button)findViewById(R.id.loginBtn);
        username=findViewById(R.id.username);
        password=findViewById(R.id.password);
        handler=new LoginHandler(LoginHandlerActivity.this);
        progressBar=findViewById(R.id.progressBar);
        progressBar.setVisibility(View.INVISIBLE);
        loginBtn.setOnClickListener(new View.OnClickListener(){
            @Override
            public void onClick(View view) {
                String uname=loginViewModel.getLoginVo().username.get();
                progressBar.setVisibility(View.VISIBLE);
                loginBtn.setEnabled(false);
                new Thread(){
                    @Override
                    public void run() {
                        //子线程内部不能执行UI操作,只传输数据
                        try {
                            //睡眠3秒 模拟网络请求
                            Thread.sleep(3000);
                        } catch (InterruptedException e) {
                            e.printStackTrace();
                        }
                        //TODO: 发送用户名给handler
                    }
                }.start();

            }
        });

    }
}
- 设置
LoginHandlerActivity为主活动,测试登录效果。
【任务名称】 任务4.2 构建并运行物联网云平台
【任务目的】
- 掌握物联网云平台搭建
【任务环境】
- 一台运行 64 位版本的 Windows(8、10 或 11)、Linux、macOS(10.14 Mojave 或更高版本)或 Chrome 操作系统的计算机。
- 计算机可以访问互联网。
- 内存:至少6G
- 硬盘:至少空余20G
- JDK 8或以上
- MySQL 或 MariaDB
【任务要求】
- 搭建物联网云平台
【任务步骤】
先安装 MariaDB(mariadb-10.4.13-winx64.msi)。
使用数据库的
root用户执行iot-cloud-tr.sql脚本。运行脚本
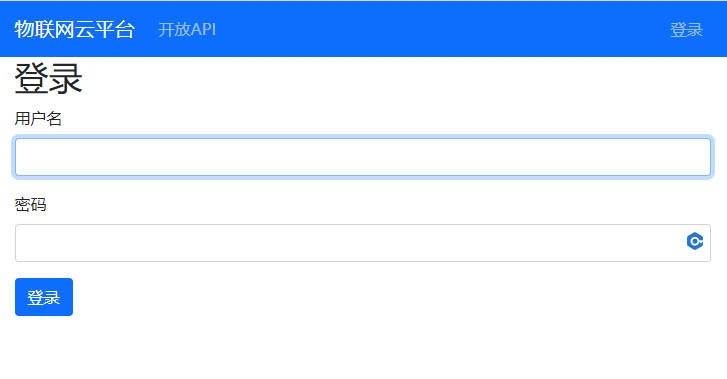
0-start-iot-cloud.bat双击打开“物联网云平台首页”快捷方式,访问
http://localhost:8098/login
【任务名称】 任务4.3 SmartHome 项目使用 Retrofit 框架实现通过云平台 API 登录
【任务目的】
- 掌握 Retrofit 框架的应用
【任务环境】
- 一台运行 64 位版本的 Windows(8、10 或 11)、Linux、macOS(10.14 Mojave 或更高版本)或 Chrome 操作系统的计算机。
- 计算机可以访问互联网。
- 内存:至少6G
- 硬盘:至少空余20G
- JDK 8或以上
- Android Studio
- iot-cloud 物联网云平台
【任务要求】
- 使用 Retrofit 框架实现通过云平台 API 登录
【任务步骤】
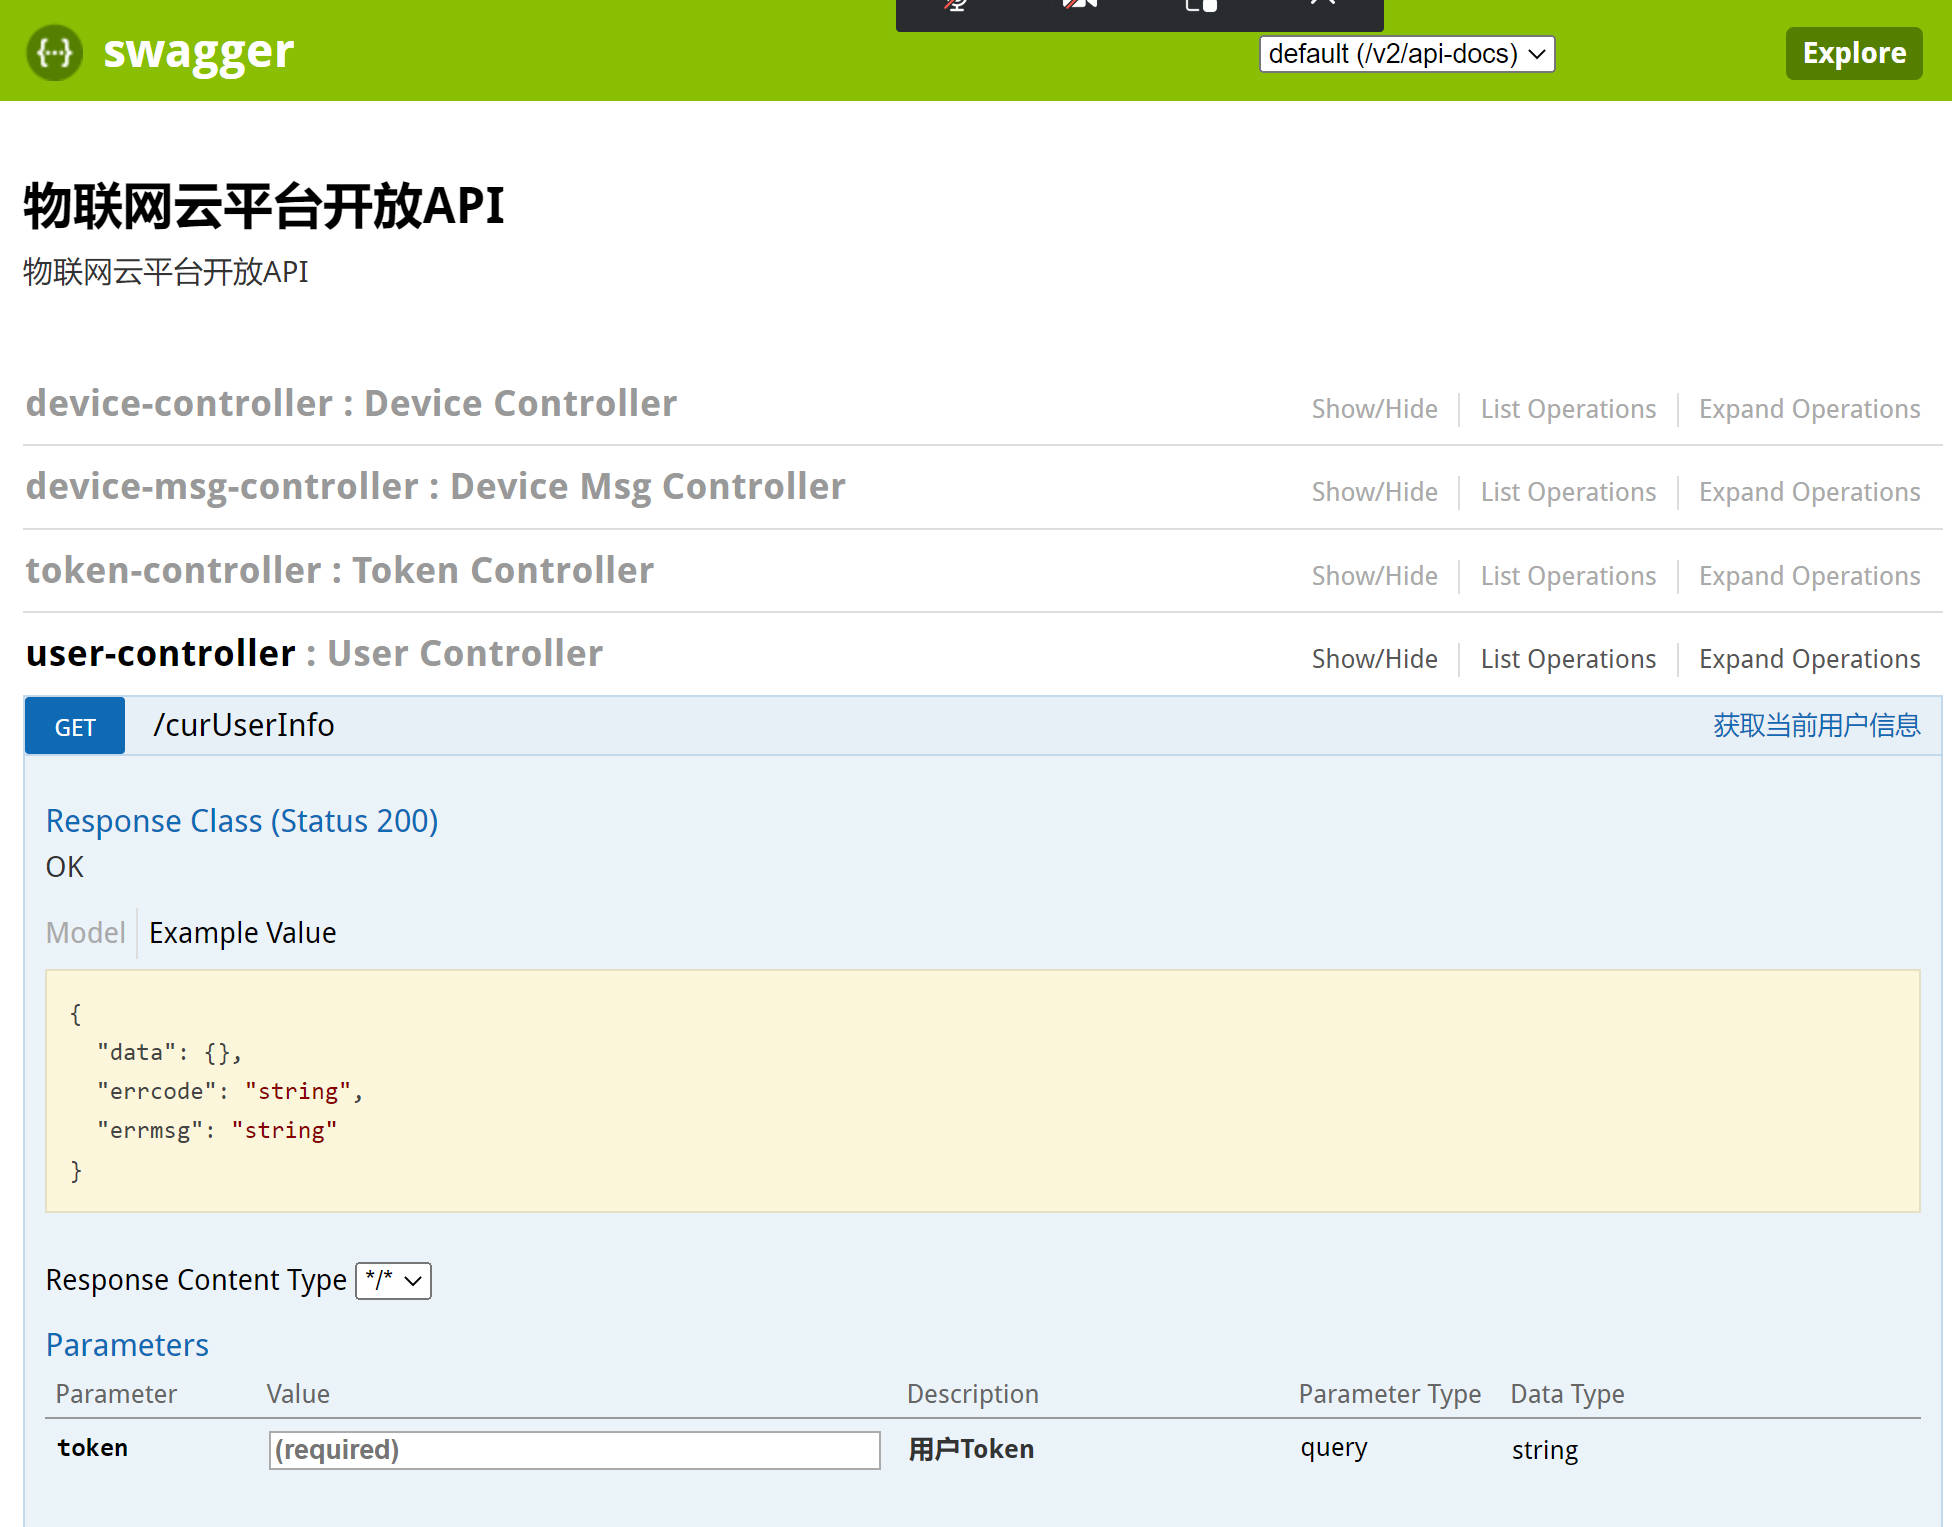
查看物联网云平台的 登录获取令牌的API。
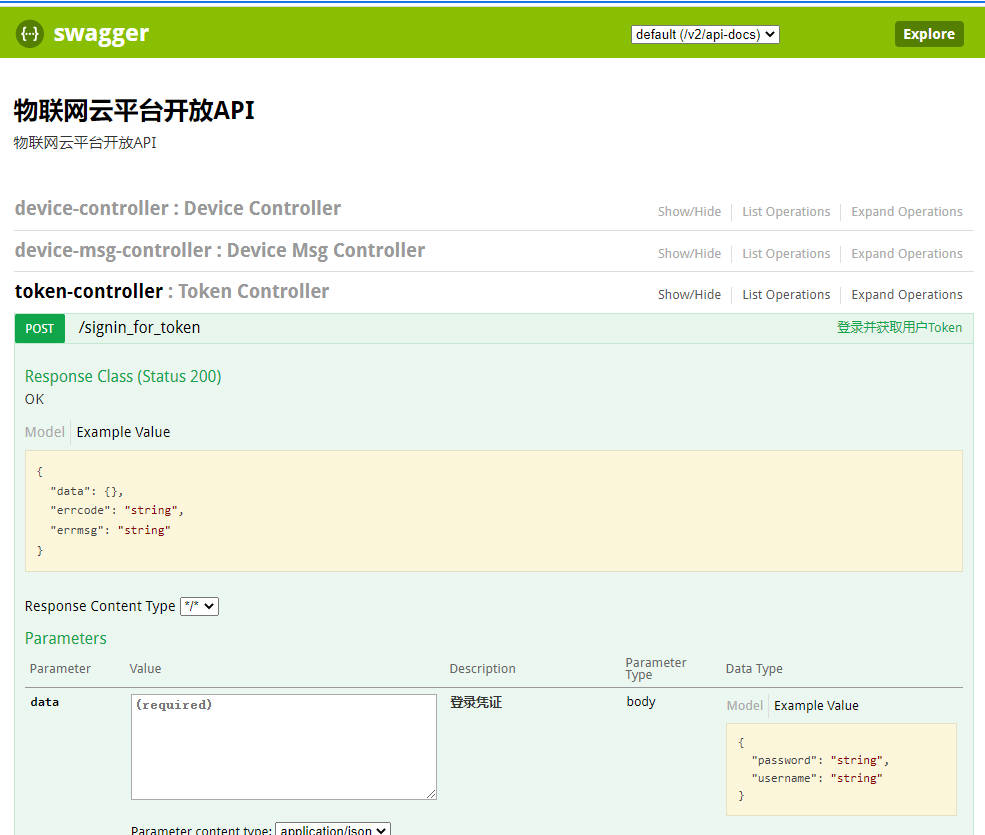
尝试调用 API。通过用户名
zhangsan和密码123456获取令牌。 -提交数据
{
  "password": "123456",
  "username": "zhangsan"
}
-获取响应数据示例
{
  "errcode": "0",
  "errmsg": "登录成功",
  "data": {
    "userId": "zhangsan",
    "token": "d765472450723b5c834384e1728e07a24c30d244096119a64202d9acd89e3651",
    "expiredTime": "2022-09-15T11:31:13.587+00:00",
    "expiredTs": 1663241473587
  }
}
- 打开
smarthome项目,添加并完善以下代码。
项目目录架构
src
  |-main
    build.gradle
    |- AndroidManifest.xml
    |- java
        |-iot.app.smarthome
          |- api
      	    |- Api.java
      	  |- model
      	    |- message
      	      |- ResMsg.java
      	    |- login
      	      |- LoginRequest.java
      	  	  |- UserTokenVo.java
    	  |- ui
    	    |- login
    	      |- LoginActivity.java
AndroidManifest.xml
- 在manifest标签下加入权限
<?xml version="1.0" encoding="utf-8"?>
<manifest xmlns:android="http://schemas.android.com/apk/res/android"
    xmlns:tools="http://schemas.android.com/tools"
      package="iot.app.smarthome">
      <uses-permission android:name="android.permission.INTERNET" /> <!-- 允许程序获取网络权限 -->
      <uses-permission android:name="android.permission.ACCESS_NETWORK_STATE" /> <!-- 允许程序获取网络状态 -->
      <uses-permission android:name="android.permission.ACCESS_WIFI_STATE" /> <!-- 允许程序获取 WiFi 状态 -->
      <!-- application 部分代码省略-->
</manifest>
build.gradle(Module 模块级别)
- 请在dependencies中加入以下2行 implementation 开头的代码
dependencies {

    //请在dependencies中加入以下2行代码
    implementation 'com.squareup.retrofit2:retrofit:2.4.0'
    implementation 'com.squareup.retrofit2:converter-gson:2.1.0'

}
Api.java
- 此类用于访问物联网云平台获取令牌的API。
import iot.app.smarthome.model.login.LoginRequest;
import iot.app.smarthome.model.login.UserTokenVo;
import iot.app.smarthome.model.message.ResMsg;
import iot.app.smarthome.model.user.UserInfoVo;
import retrofit2.Call;
import retrofit2.Retrofit;
import retrofit2.converter.gson.GsonConverterFactory;
import retrofit2.http.Body;
import retrofit2.http.GET;
import retrofit2.http.POST;
import retrofit2.http.Query;

public interface Api {
    String BASE_URL="http://10.0.2.2:8098";

    Retrofit RETROFIT = new Retrofit.Builder()
            .addConverterFactory(GsonConverterFactory.create())
            .baseUrl(BASE_URL)
            .build();

    /**
     * 登录获取令牌
     * @param loginRequest
     * @return
     */
    @POST("/signin_for_token")
    Call<ResMsg<UserTokenVo>> login(@Body LoginRequest loginRequest);
}
ResMsg.java
package iot.app.smarthome.model.message;

/**
 * 响应消息
 * @param <T>
 */
public class ResMsg<T> {
    private String errcode="0";
    private String errmsg;
    private T data;

    public ResMsg(){

    }

    public ResMsg(String errcode, String errmsg){
        this.errcode=errcode;
        this.errmsg=errmsg;
    }

    public boolean success(){
        return "0".equals(errcode);
    }

    public String getErrcode() {
        return errcode;
    }

    public void setErrcode(String errcode) {
        this.errcode = errcode;
    }

    public String getErrmsg() {
        return errmsg;
    }

    public void setErrmsg(String errmsg) {
        this.errmsg = errmsg;
    }

    public T getData() {
        return data;
    }

    public void setData(T data) {
        this.data = data;
    }
}
LoginRequest.java
package iot.app.smarthome.model.login;

public class LoginRequest {
    private String username;
    private String password;

    public String getUsername() {
        return username;
    }

    public void setUsername(String username) {
        this.username = username;
    }

    public String getPassword() {
        return password;
    }

    public void setPassword(String password) {
        this.password = password;
    }
}
UserTokenVo.java(请完善代码)
package iot.app.smarthome.model.login;

import java.util.Date;

public class UserTokenVo {
    //TODO:请自行实现代码
}
LoginActivity.java(请完善代码)
请改进 LoginActivity.java 代码,实现通过云平台API 获取登录令牌,获取成功则跳转MainActivity,否则提示错误。
以下为 Retrofit 代码示例,仅供参考。
Api httpApi= Api.RETROFIT.create(Api.class);
LoginRequest req=new LoginRequest();
req.setUsername("");
req.setPassword("");
Call<ResMsg<UserTokenVo>> call = httpApi.login(req);
call.enqueue(new Callback<ResMsg<UserTokenVo>>() {
    @Override
    public void onResponse(Call<ResMsg<UserTokenVo>> call, Response<ResMsg<UserTokenVo>> response) {
        ResMsg<UserTokenVo> resMsg=response.body();
        if(resMsg.success()){
           //登录成功
        }else{
           //登录失败
        }
    }    @Override
    public void onFailure(Call<ResMsg<UserTokenVo>> call, Throwable t) {
        Toast.makeText(LoginActivity.this,"网络似乎有问题哦",Toast.LENGTH_SHORT).show();
    }
});
【任务名称】 任务4.4 改进 SmartHome 项目的 MainActivity
【任务目的】
- 掌握使用碎片和组件构建 smarthome 的主界面
【任务环境】
- 一台运行 64 位版本的 Windows(8、10 或 11)、Linux、macOS(10.14 Mojave 或更高版本)或 Chrome 操作系统的计算机。
- 计算机可以访问互联网。
- 内存:至少6G
- 硬盘:至少空余20G
- JDK 8或以上
- Android Studio
- iot-cloud 物联网云平台
【任务要求】
- 本实验承接任务4.1项目 SmartHome
- 构建 SmartHome 的主界面(MainActivity),主界面包含
设备和我2个部分。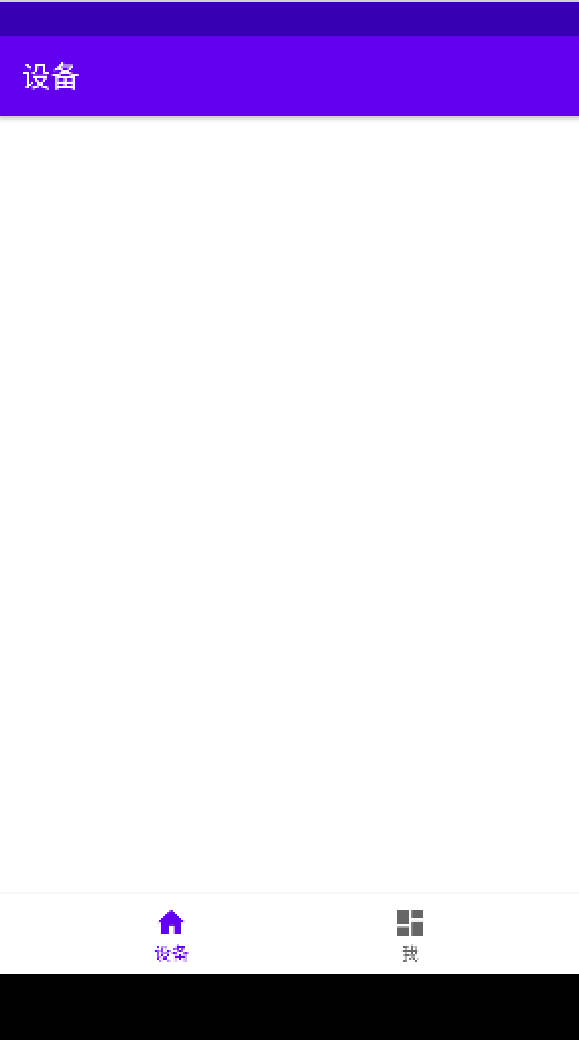
【任务步骤】
项目目录架构
src
  |-main
    build.gradle
    |- AndroidManifest.xml
    |- java
        |-iot.app.smarthome
		  |- model
		    |- user
			  |- ObservableUserInfo.java
    	  |- ui
		    |- device
			  |- DeviceFragement.java
			|- mine
			  |- MineFragement.java
    	    |- MainActivity.java
    	  |- vm
		    |- device
			  |- DeviceViewModel.java
			|- mine
			  |- MineViewModel.java
    |- res
	  |- drawable
	    |- ic_dashboard_black_24dp.xml
		|- ic_home_black_24dp.xml
	  |- layout
	    |- fragment_device.xml
		|- fragment_mine.xml
	  |- menu
	    |- bottom_nav_menu.xml
	  |- values
	    |- strings.xml
	  |- navigation
	    |- mobile_navigation.xml
build.gradle(Module 模块级别)
- 引入相关组件包。
- 请在
build.gradle的 dependencies 模块中加入以下4行 implementation 开头的代码
dependencies {

    //请在dependencies中加入以下4行代码
	implementation "androidx.swiperefreshlayout:swiperefreshlayout:1.1.0"
    implementation 'androidx.navigation:navigation-fragment:2.3.5'
    implementation 'androidx.navigation:navigation-ui:2.3.5'
    implementation 'androidx.legacy:legacy-support-v4:1.0.0'

}
DeviceFragment.java
- 添加
设备碎片(DeviceFragment),构建设备界面。
package iot.app.smarthome.ui.device;

import android.os.Bundle;
import android.view.LayoutInflater;
import android.view.View;
import android.view.ViewGroup;

import androidx.annotation.NonNull;
import androidx.annotation.Nullable;
import androidx.fragment.app.Fragment;
import androidx.lifecycle.ViewModelProvider;

import iot.app.smarthome.databinding.FragmentDeviceBinding;
import iot.app.smarthome.vm.device.DeviceViewModel;

public class DeviceFragment extends Fragment {
    private FragmentDeviceBinding binding;
    private DeviceViewModel mViewModel;

    @Override
    public View onCreateView(@NonNull LayoutInflater inflater, @Nullable ViewGroup container,
                             @Nullable Bundle savedInstanceState) {
        mViewModel = new ViewModelProvider(this).get(DeviceViewModel.class);
        binding = FragmentDeviceBinding.inflate(inflater, container, false);
        View root = binding.getRoot();
        return root;
    }

    @Override
    public void onDestroyView() {
        super.onDestroyView();
        binding = null;
    }
}
fragment_device.xml
设备碎片对应的布局。
<?xml version="1.0" encoding="utf-8"?>
<androidx.constraintlayout.widget.ConstraintLayout xmlns:android="http://schemas.android.com/apk/res/android"
    xmlns:app="http://schemas.android.com/apk/res-auto"
    xmlns:tools="http://schemas.android.com/tools"
    android:layout_width="match_parent"
    android:layout_height="match_parent"
    tools:context=".ui.device.EmptyDeviceFragment">

</androidx.constraintlayout.widget.ConstraintLayout >
DeviceViewModel.java
设备碎片对应的ViewModel。
package iot.app.smarthome.vm.device;

import androidx.lifecycle.ViewModel;

public class DeviceViewModel extends ViewModel {
    // TODO: Implement the ViewModel
}
MineFragment.java
- 添加
我碎片(MineFragment),构建我界面。
package iot.app.smarthome.ui.mine;

import android.os.Bundle;
import android.view.LayoutInflater;
import android.view.View;
import android.view.ViewGroup;

import androidx.annotation.NonNull;
import androidx.annotation.Nullable;
import androidx.fragment.app.Fragment;

import iot.app.smarthome.databinding.FragmentMineBinding;
import iot.app.smarthome.vm.mine.MineViewModel;

public class MineFragment extends Fragment {

    private FragmentMineBinding binding;
    private MineViewModel mineViewModel;

    @Override
    public View onCreateView(@NonNull LayoutInflater inflater, @Nullable ViewGroup container,
                             @Nullable Bundle savedInstanceState) {
        mineViewModel = new MineViewModel();
        binding = FragmentMineBinding.inflate(inflater, container, false);
        View root = binding.getRoot();
        binding.setMineViewModel(mineViewModel);
        return root;
    }

    @Override
    public void onDestroyView() {
        super.onDestroyView();
        binding = null;
    }
}
fragment_mine.xml
我碎片对应的布局
<?xml version="1.0" encoding="utf-8"?>
<layout xmlns:android="http://schemas.android.com/apk/res/android"
    xmlns:app="http://schemas.android.com/apk/res-auto"
    xmlns:tools="http://schemas.android.com/tools">
    <data>
        <variable
            name="mineViewModel"
            type="iot.app.smarthome.vm.mine.MineViewModel" />
    </data>

    <androidx.swiperefreshlayout.widget.SwipeRefreshLayout
        android:id="@+id/mine_swipe_view"
        android:layout_width="wrap_content"
        android:layout_height="wrap_content"
        tools:ignore="MissingConstraints"
        tools:context=".ui.mine.MineFragment">
    <LinearLayout
        android:layout_width="match_parent"
        android:layout_height="match_parent"
        android:orientation="vertical">

        <ImageView
            android:id="@+id/myAvatar"
            android:layout_width="match_parent"
            android:layout_height="wrap_content"
            tools:src="@tools:sample/avatars" />
        <TextView
            android:id="@+id/myUserAvatar"
            android:layout_width="match_parent"
            android:layout_height="wrap_content"
            android:text="@={mineViewModel.userInfo.useravatar}"
            android:visibility="invisible"
            android:textAlignment="center"
            android:textSize="20sp" />

        <TextView
            android:id="@+id/myUserName"
            android:layout_width="match_parent"
            android:layout_height="wrap_content"
            android:text="@={mineViewModel.userInfo.username}"
            android:textAlignment="center"
            android:textSize="20sp" />

        <TextView
            android:id="@+id/myUserId"
            android:layout_width="match_parent"
            android:layout_height="wrap_content"
            android:text="@={mineViewModel.userInfo.userid}"
            android:textAlignment="center"
            android:textSize="16sp" />

        <Button
            android:id="@+id/logoutBtn"
            android:layout_width="match_parent"
            android:layout_height="wrap_content"
            android:text="退出" />
    </LinearLayout>
    </androidx.swiperefreshlayout.widget.SwipeRefreshLayout>
</layout>
MineViewModel.java
我碎片对应的 ViewModel
public class MineViewModel extends ViewModel {

    public ObservableUserInfo userInfo;
    public MineViewModel(){
        this.userInfo=new ObservableUserInfo();
    }

}
ObservableUserInfo.java
- 可观察的用户信息对象
import androidx.databinding.ObservableField;

public class ObservableUserInfo {
    public ObservableField<String> username=new ObservableField<>();
    public ObservableField<String> userid=new ObservableField<>();
    public ObservableField<String> useravatar=new ObservableField<>();
}
activity_main.xml
- 给主界面布局文件
activity_main.xml添加底部导航栏组件。
<?xml version="1.0" encoding="utf-8"?>
<androidx.constraintlayout.widget.ConstraintLayout xmlns:android="http://schemas.android.com/apk/res/android"
    xmlns:app="http://schemas.android.com/apk/res-auto"
    android:id="@+id/container"
    android:layout_width="match_parent"
    android:layout_height="match_parent"
    android:paddingTop="0dp">

    <fragment
        android:id="@+id/nav_host_fragment_activity_main"
        android:name="androidx.navigation.fragment.NavHostFragment"
        android:layout_width="match_parent"
        android:layout_height="0dp"
        app:defaultNavHost="true"
        app:layout_constraintBottom_toTopOf="@id/nav_view"
        app:layout_constraintLeft_toLeftOf="parent"
        app:layout_constraintRight_toRightOf="parent"
        app:layout_constraintTop_toTopOf="parent"
        app:navGraph="@navigation/mobile_navigation" />
    <com.google.android.material.bottomnavigation.BottomNavigationView
        android:id="@+id/nav_view"
        android:layout_width="0dp"
        android:layout_height="wrap_content"
        android:layout_marginStart="0dp"
        android:layout_marginEnd="0dp"
        android:background="?android:attr/windowBackground"
        app:layout_constraintBottom_toBottomOf="parent"
        app:layout_constraintLeft_toLeftOf="parent"
        app:layout_constraintRight_toRightOf="parent"
        app:menu="@menu/bottom_nav_menu" />
</androidx.constraintlayout.widget.ConstraintLayout>
mobile_navigation.xml
- 导航栏碎片定义,包含
设备碎片和我碎片,制定设备碎片为开始展示碎片。
<?xml version="1.0" encoding="utf-8"?>
<navigation xmlns:android="http://schemas.android.com/apk/res/android"
    xmlns:app="http://schemas.android.com/apk/res-auto"
    xmlns:tools="http://schemas.android.com/tools"
    android:id="@+id/mobile_navigation"
    app:startDestination="@+id/navigation_device">

    <fragment
        android:id="@+id/navigation_device"
        android:name="iot.app.smarthome.ui.device.DeviceFragment"
        android:label="@string/title_device"
        tools:layout="@layout/fragment_device" />
    <fragment
        android:id="@+id/navigation_mine"
        android:name="iot.app.smarthome.ui.mine.MineFragment"
        android:label="@string/title_mine"
        tools:layout="@layout/fragment_mine" />
</navigation>
bottom_nav_menu.xml
- 导航栏图标设置。
<?xml version="1.0" encoding="utf-8"?>
<menu xmlns:android="http://schemas.android.com/apk/res/android">
    <item
        android:id="@+id/navigation_device"
       android:icon="@drawable/ic_home_black_24dp"
        android:title="@string/title_device" />
    <item
        android:id="@+id/navigation_mine"
        android:icon="@drawable/ic_dashboard_black_24dp"
        android:title="@string/title_mine" />
</menu>
ic_dashboard_black_24dp.xml
- 导航栏
我图标
<vector xmlns:android="http://schemas.android.com/apk/res/android"
    android:width="24dp"
    android:height="24dp"
    android:viewportWidth="24.0"
    android:viewportHeight="24.0">
    <path
        android:fillColor="#FF000000"
        android:pathData="M3,13h8L11,3L3,3v10zM3,21h8v-6L3,15v6zM13,21h8L21,11h-8v10zM13,3v6h8L21,3h-8z" />
</vector>
ic_home_black_24dp.xml
- 导航栏
设备图标
<vector xmlns:android="http://schemas.android.com/apk/res/android"
    android:width="24dp"
    android:height="24dp"
    android:viewportWidth="24.0"
    android:viewportHeight="24.0">
    <path
        android:fillColor="#FF000000"
        android:pathData="M10,20v-6h4v6h5v-8h3L12,3 2,12h3v8z" />
</vector>
strings.xml
- 字符串常量配置,
<resources>
    <string name="app_name">智慧家庭</string>
    <string name="title_device">设备</string>
    <string name="title_mine">我</string>
</resources>
MainActivity.java
- 主活动
public class MainActivity extends AppCompatActivity {

    private ActivityMainBinding binding;

    @Override
    protected void onCreate(Bundle savedInstanceState) {
        super.onCreate(savedInstanceState);

        binding = ActivityMainBinding.inflate(getLayoutInflater());
        setContentView(binding.getRoot());
        BottomNavigationView navView = findViewById(R.id.nav_view);
        AppBarConfiguration appBarConfiguration = new AppBarConfiguration.Builder(
                R.id.navigation_device, R.id.navigation_mine)
                .build();
        NavController navController = Navigation.findNavController(this, R.id.nav_host_fragment_activity_main);
        NavigationUI.setupActionBarWithNavController(this, navController, appBarConfiguration);
        NavigationUI.setupWithNavController(binding.navView, navController);

    }

}
【任务名称】 任务4.5 实现 SmartHome 项目访问云平台 API 获取用户个人信息和头像
【任务目的】
- 掌握 Retrofit 框架和 Glide 框架的应用
【任务环境】
- 一台运行 64 位版本的 Windows(8、10 或 11)、Linux、macOS(10.14 Mojave 或更高版本)或 Chrome 操作系统的计算机。
- 计算机可以访问互联网。
- 内存:至少6G
- 硬盘:至少空余20G
- JDK 8或以上
- Android Studio
- iot-cloud 物联网云平台
【任务要求】
- 本实验承接任务4.4项目 SmartHome
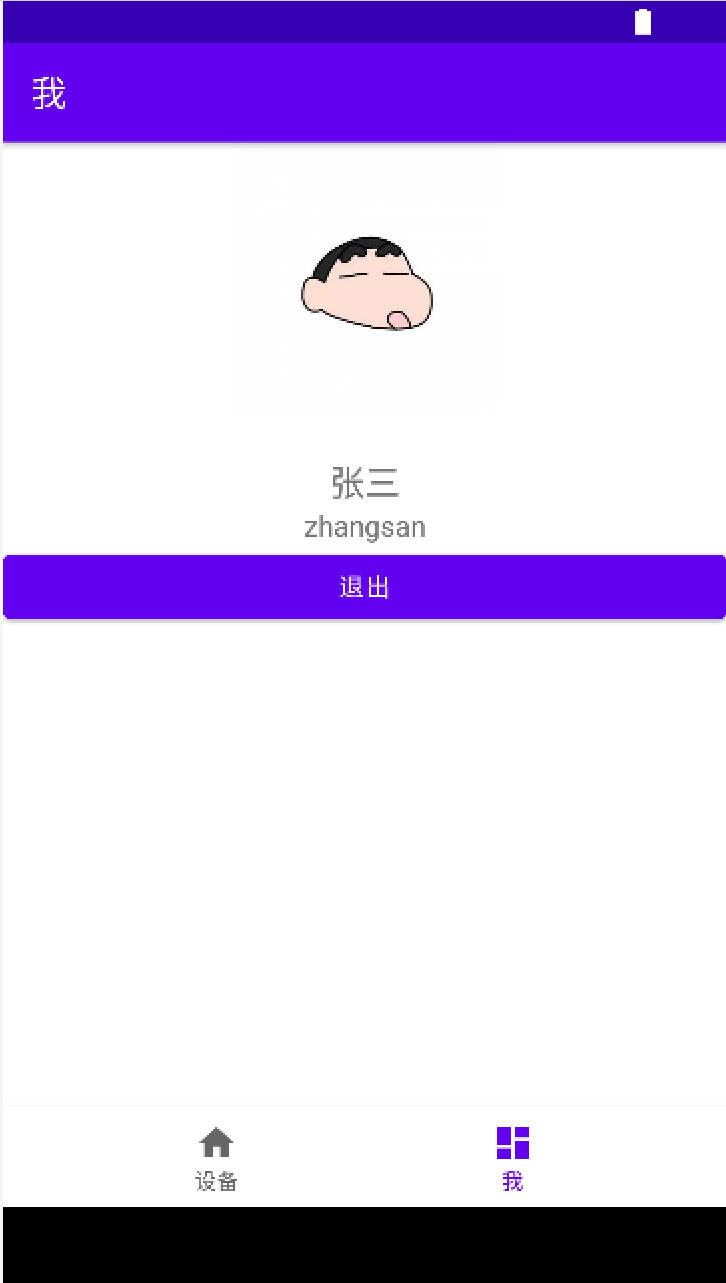
- 下拉
我界面,实现从云平台 API 获取用户个人信息和头像。
【任务步骤】
查看云平台的获取当前用户信息API。 .
尝试调用 API。通过用户名
zhangsan和密码123456获取令牌。 -提交数据
{
  "password": "123456",
  "username": "zhangsan"
}
-获取响应数据示例
{
  "errcode": "0",
  "errmsg": "登录成功",
  "data": {
    "userId": "zhangsan",
    "token": "d765472450723b5c834384e1728e07a24c30d244096119a64202d9acd89e3651",
    "expiredTime": "2022-09-15T11:31:13.587+00:00",
    "expiredTs": 1663241473587
  }
}
Api.java
- 在Api 类实现此API。
import iot.app.smarthome.model.login.LoginRequest;
import iot.app.smarthome.model.login.UserTokenVo;
import iot.app.smarthome.model.message.ResMsg;
import iot.app.smarthome.model.user.UserInfoVo;
import retrofit2.Call;
import retrofit2.Retrofit;
import retrofit2.converter.gson.GsonConverterFactory;
import retrofit2.http.Body;
import retrofit2.http.GET;
import retrofit2.http.POST;
import retrofit2.http.Query;

public interface Api {
    String BASE_URL="http://10.0.2.2:8098";

    Retrofit RETROFIT = new Retrofit.Builder()
            .addConverterFactory(GsonConverterFactory.create())
            .baseUrl(BASE_URL)
            .build();

    /**
     * 登录获取令牌
     * @param loginRequest
     * @return
     */
    @POST("/signin_for_token")
    Call<ResMsg<UserTokenVo>> login(@Body LoginRequest loginRequest);

	//TODO:请参考上面的代码实现获取当前用户信息API的方法
}
- 以下为
SwipeRefreshLayout下拉刷新触发的示例代码。
SwipeRefreshLayout swipeRefreshLayout=root.findViewById(R.id.mine_swipe_view);
swipeRefreshLayout.setOnRefreshListener(new SwipeRefreshLayout.OnRefreshListener() {
    @Override
    public void onRefresh() {
        //完成刷新触发代码
    }
});
MineFragment.java
- 请自行完善
MineFragment,实现从云平台 API 获取用户个人信息和头像。